Let me start by saying—this project takes a lot of patience. But trust me, it is so worth it. I’m completely in love with how it turned out!
Originally, I dreamed of adding checkered pavers to our back patio, but with the size of that space, it just wasn’t in the budget. So, when it came time to refresh the front porch, the idea of a checkered pattern came back to me—and this time, it was doable.
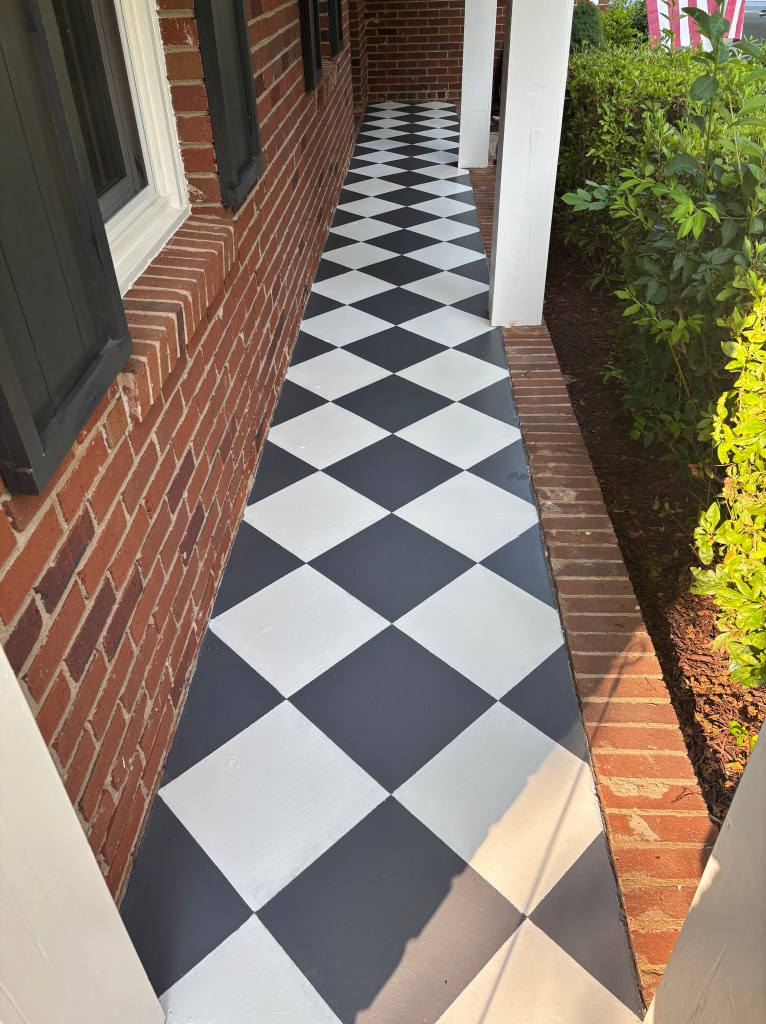
In this post, I’ll walk you through how we transformed our plain front porch into a warm, inviting space with a painted diamond checkered floor.
(Note: This post contains affiliate links)
What You’ll Need:
- Two outdoor paint colors
We used SW Dover White (to match our home’s trim) and Behr Black Pepper. I wanted something similar to our shutters (SW Iron Ore), but a touch lighter—Black Pepper is about 25% lighter and worked perfectly. - Small foam roller & 2” paint brush
For smooth application and precision on edges. - Concrete sealant
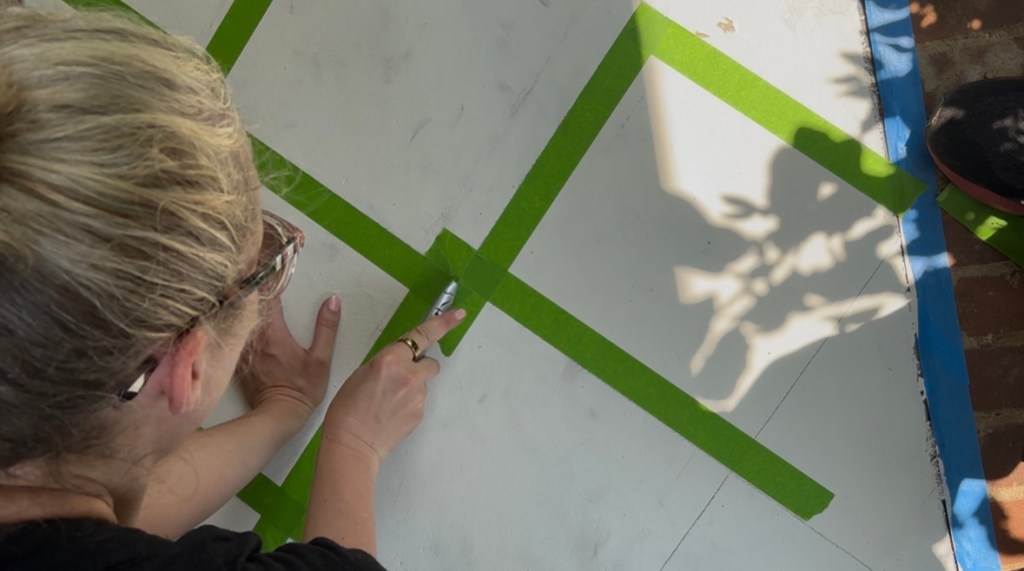
(We linked the exact one we used here.) - Painter’s tape
For clean lines when painting the pattern. - Straight edge
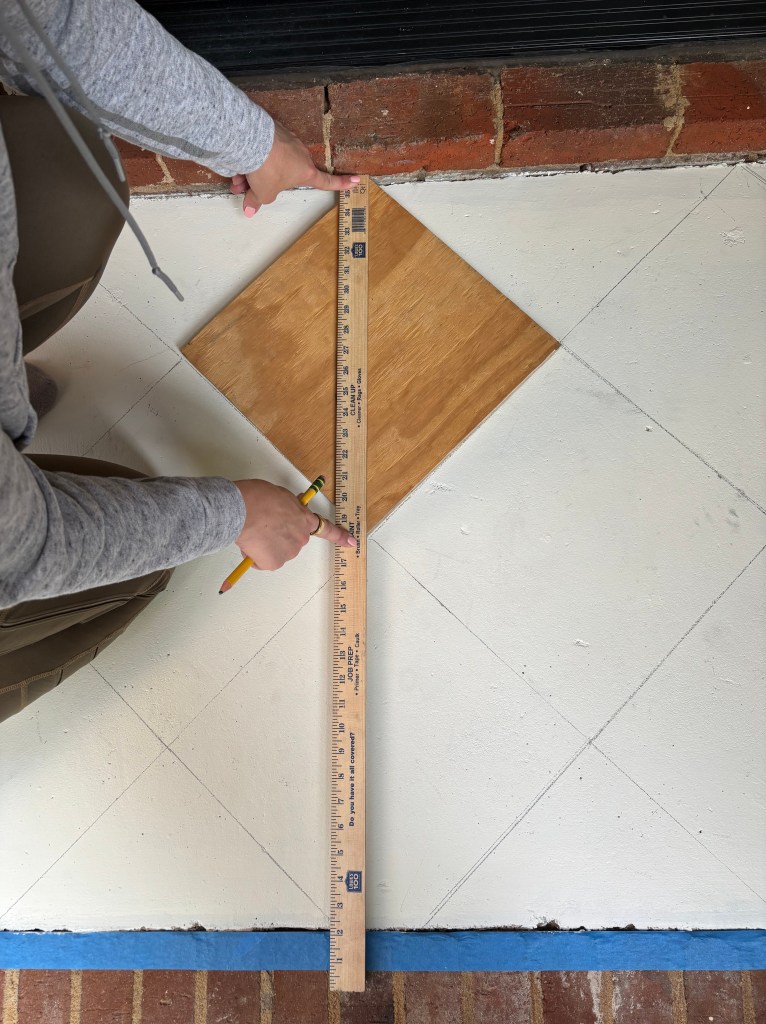
To trim tape at intersecting corners. - 12″ x 12″ Template
We made ours from a piece of plywood. You can go larger or smaller depending on your space. - Pencil, eraser, and yardstick
Essential for creating a clean, even pattern.
Step-by-Step Instructions:
Step 1: Clean the Surface
Start with a thorough cleaning using a strong outdoor cleaner. (We linked the one we used here.) Make sure the surface is fully dry before moving on.
Step 2: Paint the Base Coat
Using your lighter color (for us, Dover White), paint two full coats over the entire floor. Allow each coat to dry fully before applying the next.
Step 3: Draw the Diamond Pattern
Using your 12″ template, start against a rigid edge (like your house wall) and align the yardstick vertically making sure the top and bottom points are aligned. Trace the template. Then move the template side-to-side, keeping the top edge against the wall or surface, to create the first row.
To begin the next row, align the top point of the template with the bottom point of a diamond from the previous row. Use the yardstick to ensure the points stay perfectly lined up. Continue this process to cover the full area.
Step 4: Tape the Diamonds to Paint
Tape off only the diamonds you want to paint in the darker color. Use a straight edge to cut tape cleanly at the corners so you’re left with crisp outlines of the diamonds.

Step 5: Paint the Contrasting Color
Apply two coats of your darker color (in our case, Behr Black Pepper). Let it dry completely between coats.

Step 6: Remove the Tape
Slowly peel off the tape once the paint is dry. Some of the base coat might lift—this can actually create a charming, antique look. If you prefer a clean finish, use a small brush to touch up any spots.

Step 7: Seal It Up
After everything is dry, roll on a concrete sealant to protect your hard work and help the design last.

Final Thoughts
This project is definitely not quick or easy—but the results speak for themselves. Our front porch now feels full of personality and charm. It’s completely transformed the look of our home’s entrance, and it makes me happy every time I step outside.
Let me know if you give this a try or have any questions. I’m so excited to see others bring this idea to life!