If you’re anything like me and can’t stand the look of your air intake vent (or have one with missing hardware like we did), you’re in the right place! I searched high and low for an inexpensive cover for our vent, but since our intake vent is a unique size, no replacements were available at a reasonable cost. That’s when I decided to take matters into my own hands and create a custom decorative cover. And the best part? It’s super easy!

The following content may contain affiliate links. When you click and shop the links, we receive a commission.
Here’s a simple step-by-step guide to creating your own air vent cover.
Materials Needed:
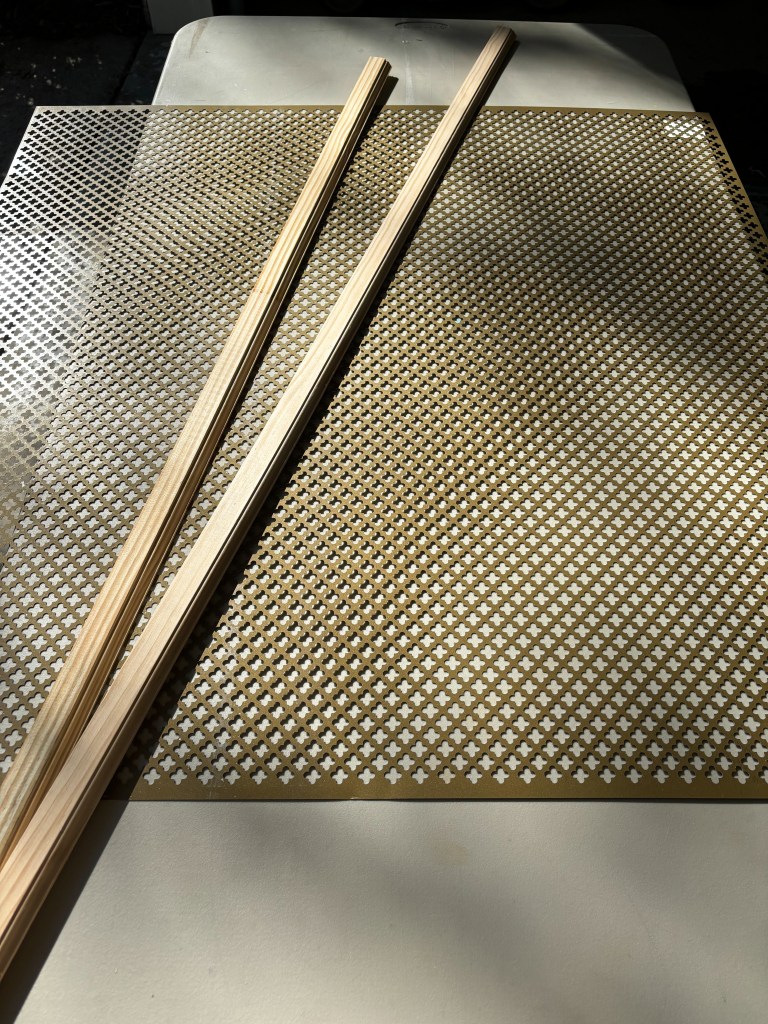
· Decorative Aluminum Sheet (I used this M-D Building Products Cloverleaf Aluminum Sheet)
· Super Glue
· Wood Glue
· 1 1/4” Decorative Unfinished Flat Utility Moulding (I used this Ornamental Mouldings Colonial Unfinished Moulding)
· Thumbtacks (I used these Brass Thumb Tacks)
· Flat L-brackets (I used these Zinc-Plated Flat Corner Braces)
· Painter’s Tape
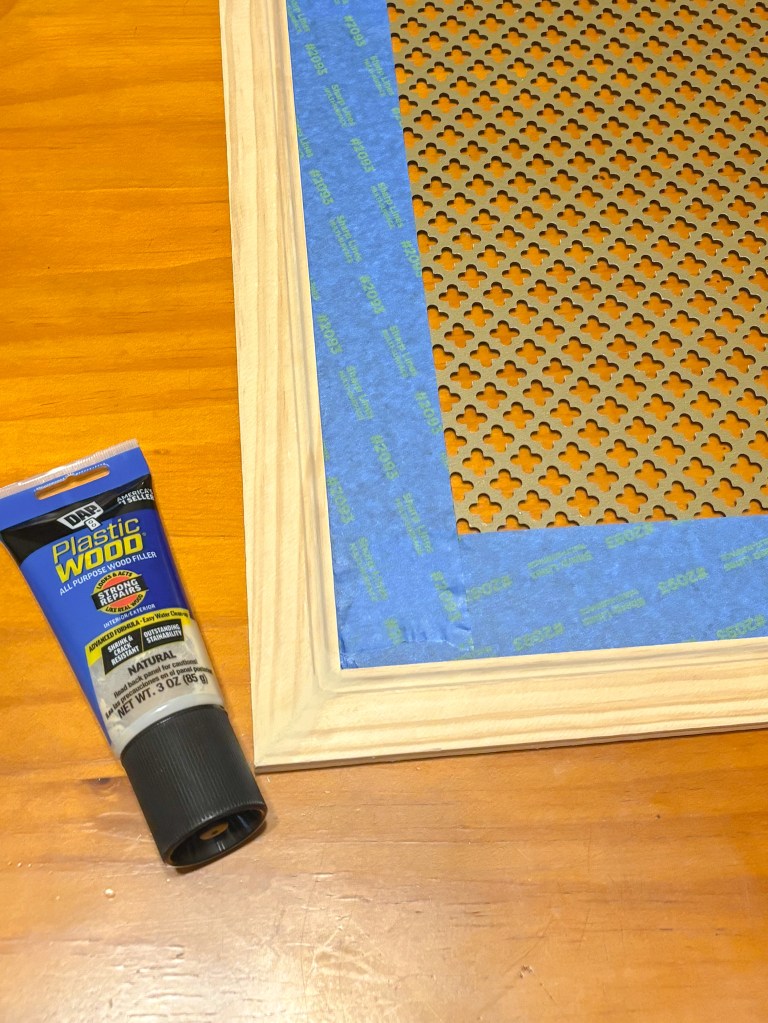
· Wood Filler
· Paint for wood trim
Tools Needed:
· Miter Saw
· Screwdriver
· Metal Clippers
· Tape Measure
Step 1: Measure Your Air Intake Vent
Start by measuring the outer rim of your air intake vent. We chose to keep our existing vent and simply cover it with a new decorative frame. This measurement will determine the size of the covering you need to create.
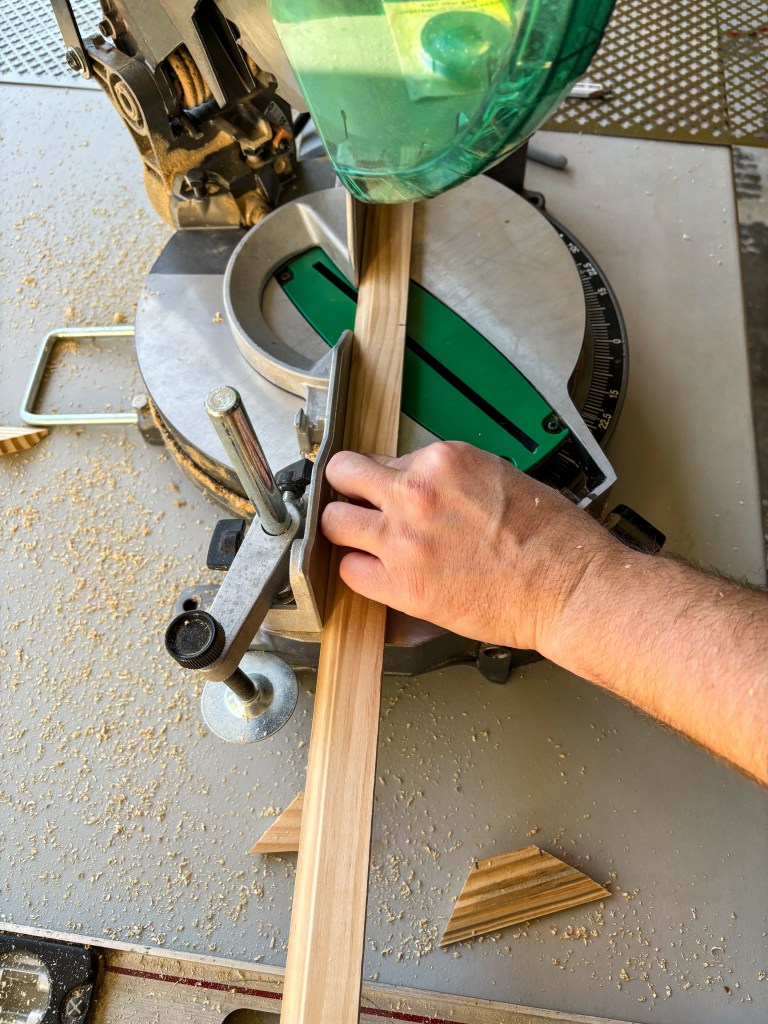
Step 2: Make the Cuts
For our cover, we needed a finished size of 19”x23”. Using that measurement, we cut the moulding accordingly. When cutting the moulding, make sure to cut at a 45-degree angle for a perfect corner fit. Double-check the direction of the angle cuts to ensure all the pieces fit together properly (we learned this the hard way ).
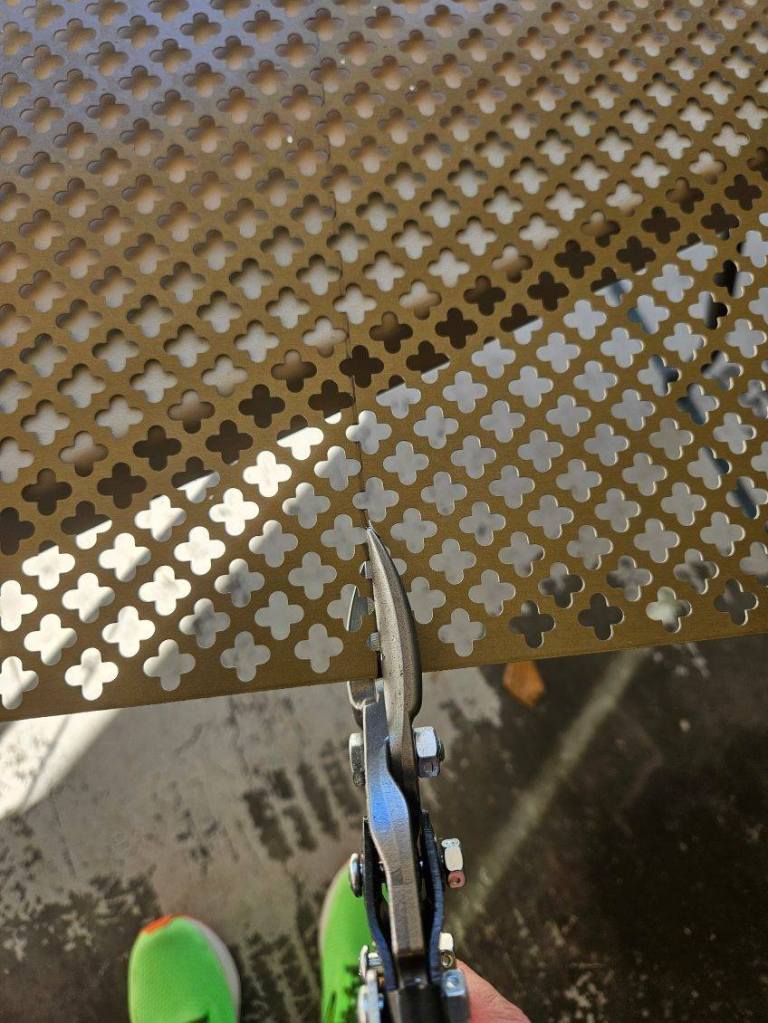
Next, cut the aluminum sheet to size, allowing for about a ½” overlap to tack it down to the back of the frame. To make this process easier, use a marker to draw your cut lines on the aluminum. Just be cautious of the sharp edges!
Step 3: Assemble the Frame
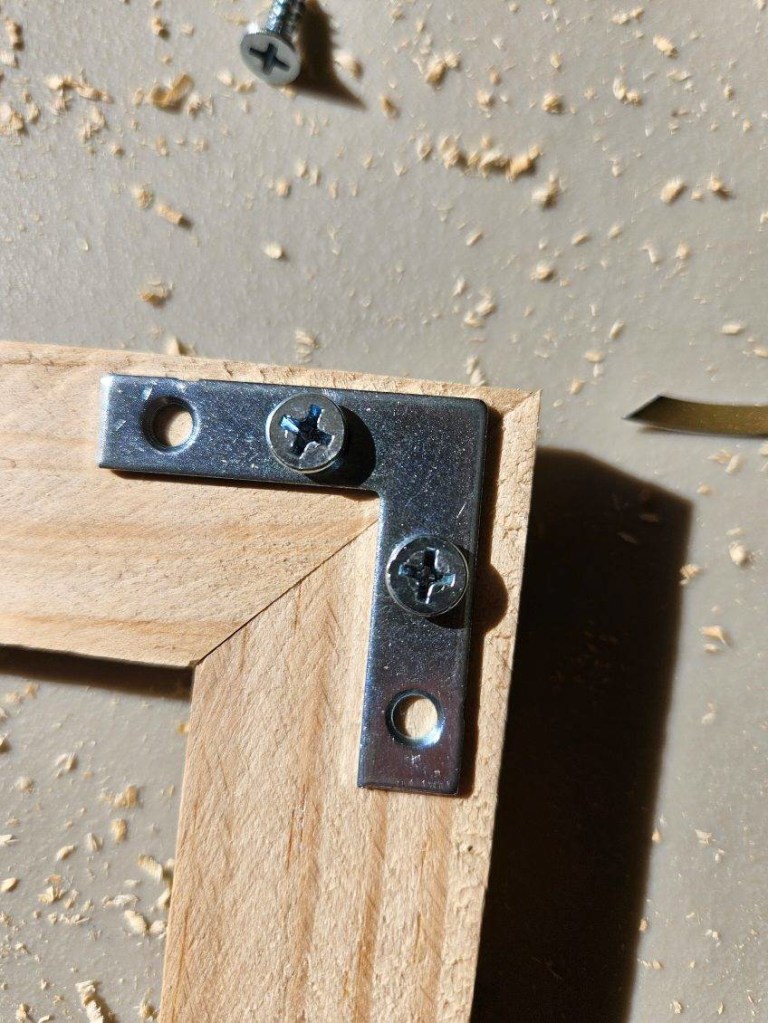
Once all the pieces are cut, it’s time to assemble the frame. Start by spreading a small amount of wood glue on the cut edges of the moulding. If you have a wood clamp, use it to hold the pieces together while the glue dries. This works best for all four corners.
Once the glue has dried, add extra support with the L-brackets. Make sure to use short screws (½” flathead screws worked for us) so they don’t poke through the front of the frame.
Now, attach the aluminum sheet to the frame. Line it up with the design to make sure it’s centered, then use thumbtacks (about every 4 inches, including the corners) to secure the aluminum to the back of the frame.
The last step for assembly is to add the heavy-duty magnets. Apply a small drop of super glue to the back of each magnet and press it into place under the L-brackets. Hold for a minute, then let the glue dry before moving to the next step.
Step 4: Finish and Paint
To avoid getting paint on the aluminum sheet, tape the edges of the aluminum to protect it while painting the wood trim.
Next, add wood filler to any gaps at the corners for a smooth, finished look. Once it’s dry, sand it down, and you’re ready to paint!
We chose to paint our trim in white, using a color that matches our baseboard trim (White Dove). After the first coat, wait about an hour before adding a second coat for full coverage.

Tips for Your DIY Vent Cover:
· Consider the Pattern: If I could do it again, I’d search for a smaller pattern in the aluminum to cover more of the vent. I’m still happy with how it turned out, but there’s always room for improvement.
· Scent Tip: To freshen up your home, add a few drops of essential oil to your filter each time you change it. It will make the whole house smell amazing!
· Go Bold: Feeling adventurous? Use a bold color to paint both the aluminum and the trim for a dramatic pop!
Now you have a stylish, custom air vent cover to add a personal touch to your space! Enjoy your DIY project and the fresh new look it brings to your home.
Happy crafting!

