The following content may contain affiliate links. When you click and shop the links, we receive a commission.
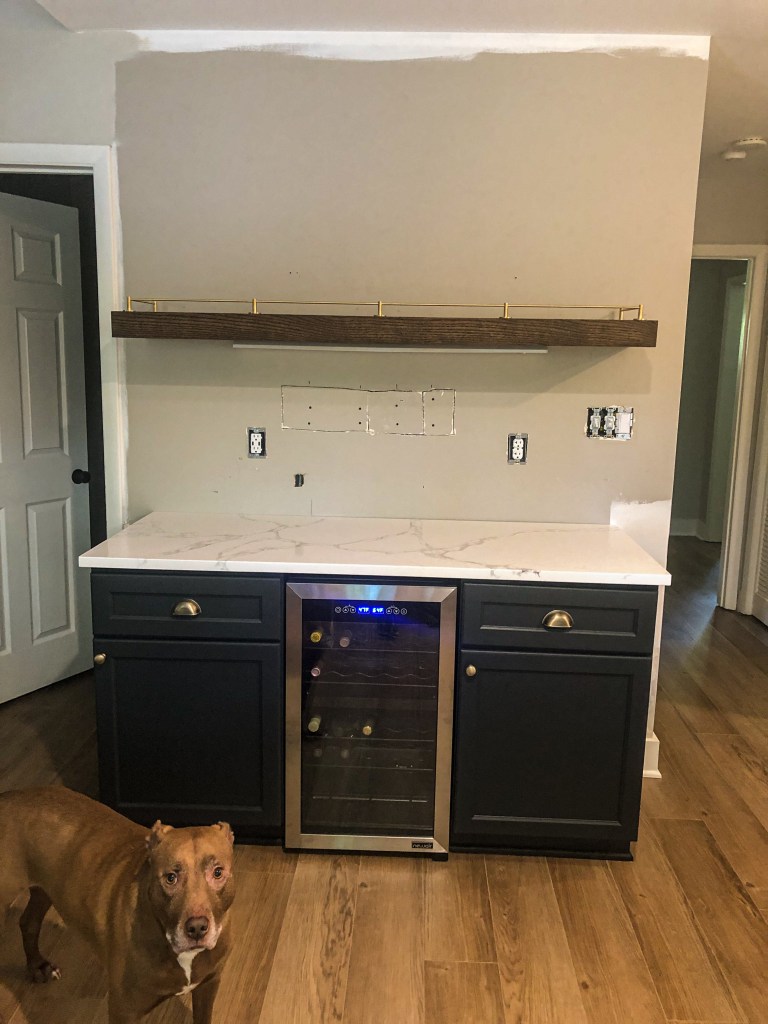
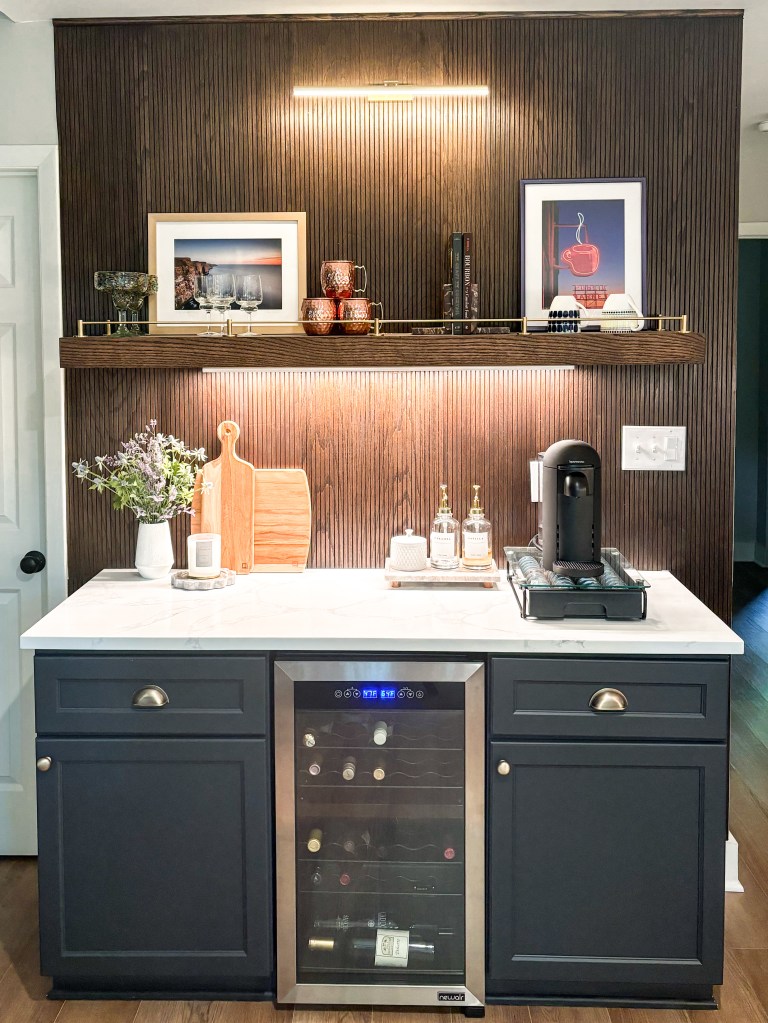
In our previous post, we shared our excitement about the successful completion of our new kitchen bar project. In this article, we’re diving into how we achieved the trendy reeded wood look on a budget.
Materials and Approach:
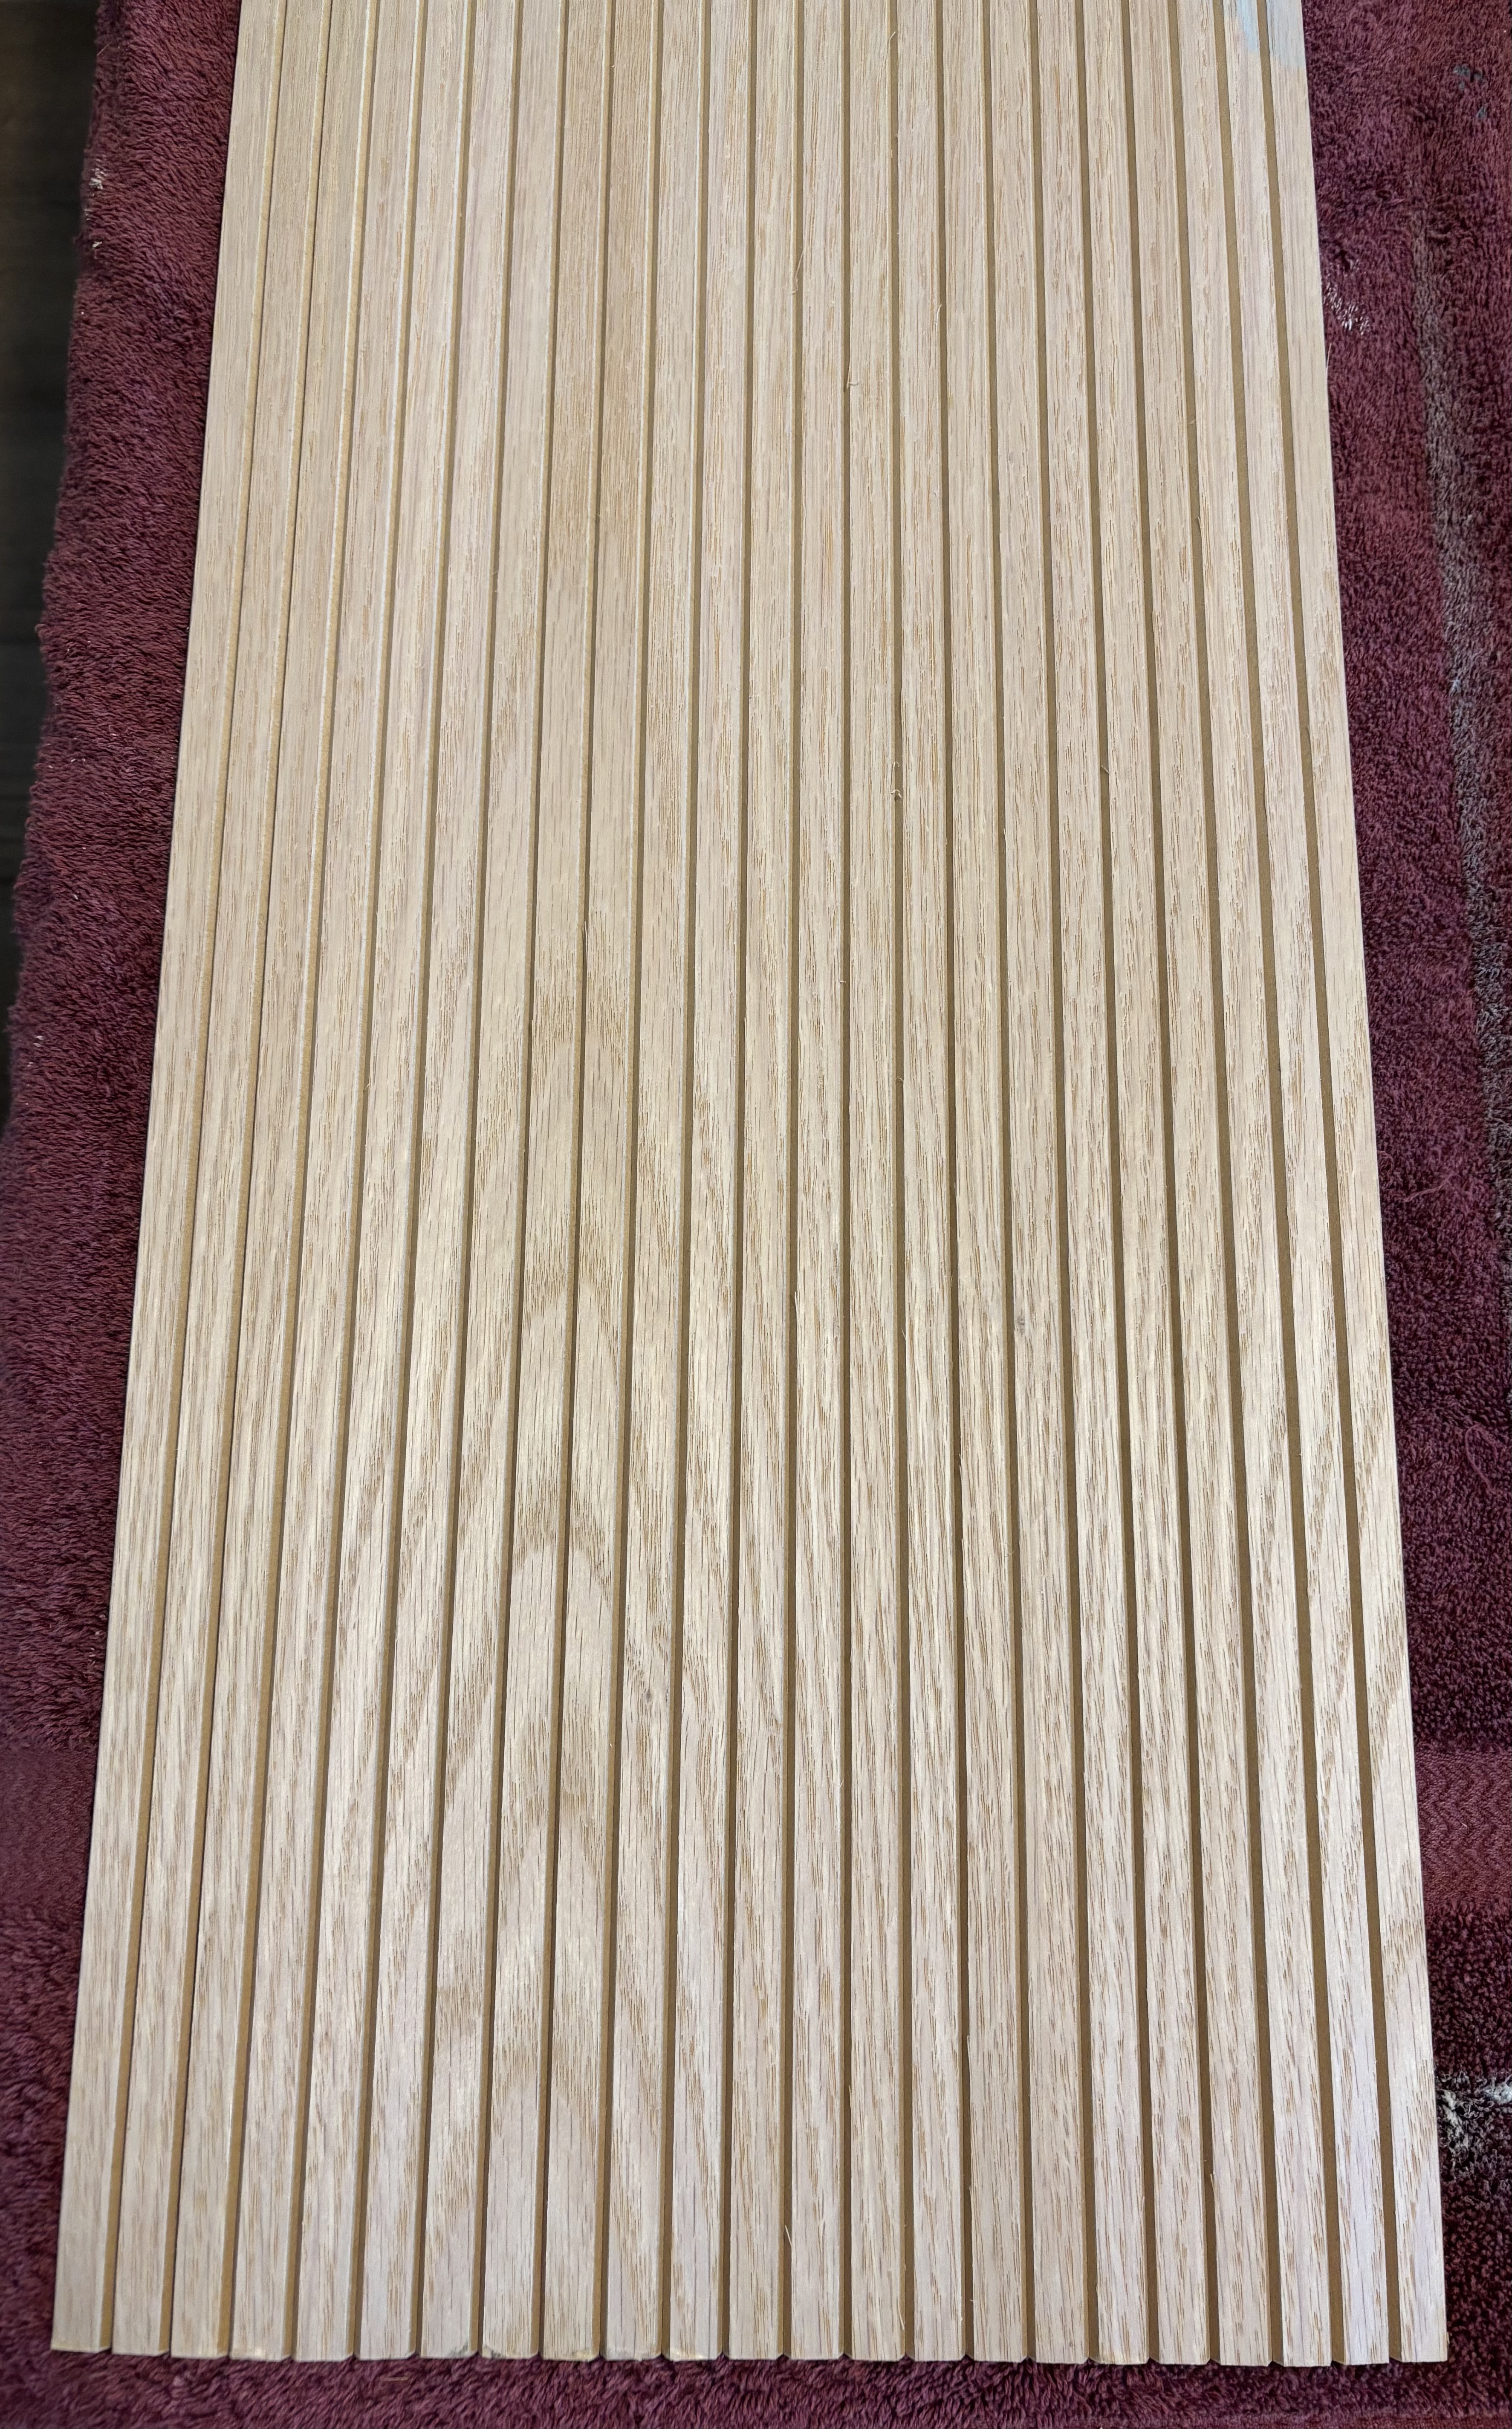
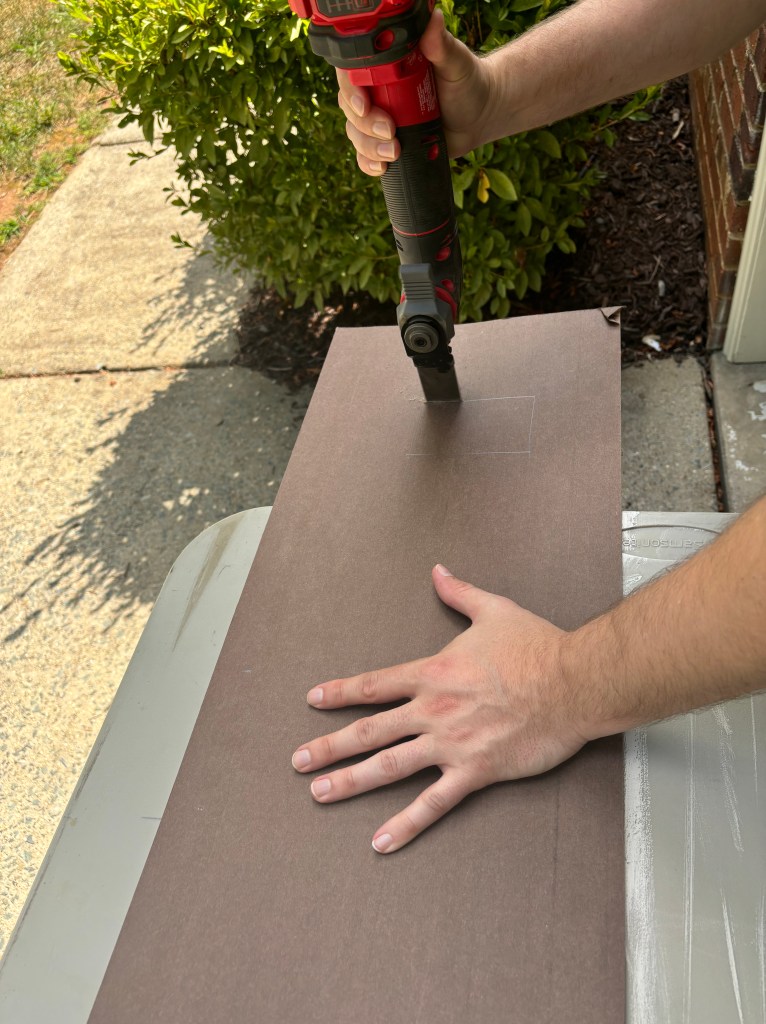
The area we covered totaled about 31.25 square feet. We opted for five 96″x16″ pole wrap panels, which proved sufficient. The main challenge was cutting around the shelf, cabinets, and electrical outlets. Ryan found the oscillating power tool particularly effective for making precise cuts. Here’s a breakdown of the tools and materials we used:
Tools and Material
- Pole Wrap Find here
- Quarter round (to cover ceiling and top of pole wrap)
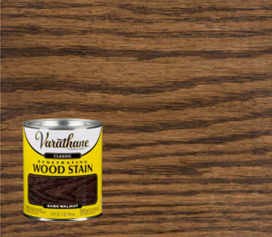
- Stain (we used Varathane Dark Walnut) Find here
- Adhesive (we used gorilla glue)
- Oscillating power tool Find here
- Nail gun
- Table saw
Step-by-Step Guide:
Step 1: Preparing and Staining
We started by sanding down any rough spots on the oak panels before applying Varathane Dark Walnut stain. This ensured an even finish and allowed us to smooth out imperfections. Following the stain manufacturer’s instructions, we applied two coats to achieve the desired color depth.
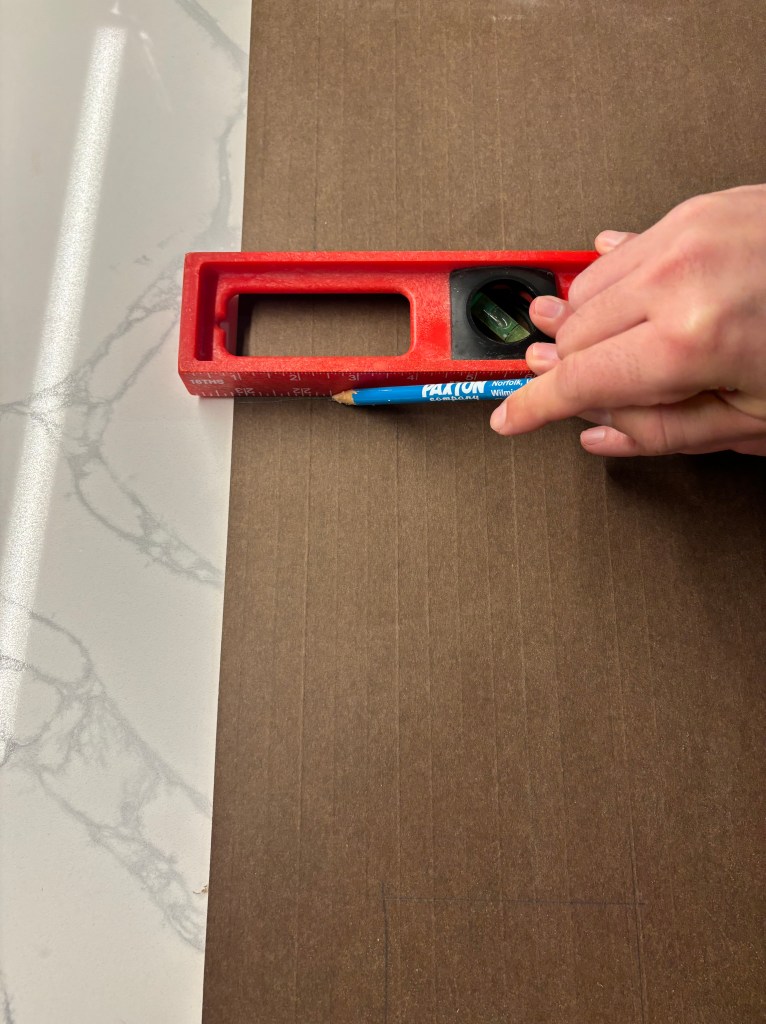
Step 2: Measuring and Cutting
We began paneling from the most visible corner of the wall to ensure a clean, straight finish. Ending along the wall with a door frame was a forgiving choice in case of minor cutting inaccuracies. Starting from the ceiling, we measured carefully around obstacles like shelves and switches. After marking the panel’s dimensions, we used a table saw for straight cuts and the oscillating tool for more intricate sections around the shelf and countertops.
Step 4: Installing the Panels
Applying adhesive to the back of the oak pole wrap, one person held it in place while the other secured it with 18-gauge nails from the nail gun. Nails were strategically placed in the grooves between the reeded wood to ensure a secure attachment without visible heads, preserving the clean aesthetic.
Step 4: Finishing Touches
To cover any minor imperfections from cutting and achieve a polished look, we added quarter round trim where the wall met the ceiling. This detail not only concealed flaws but also enhanced the overall appearance of the reeded wood paneling.
After installing the backsplash, we added a stunning battery-operated sconce. It was a breeze to set up and introduces an additional layer of light to our moody wall accent. I’m thrilled with how the project has turned out. This sconce is a fantastic choice if you lack electrical outlets or are working within a tight budget. You can find the sconce here.

By following these steps and using cost-effective materials, we achieved a modern reeded wood accent wall that seamlessly blends into our kitchen’s design. This project demonstrates that with careful planning and the right tools, you can achieve a high-quality finish without exceeding your budget. We’re thrilled with how this transformation has added both functionality and aesthetic charm to our kitchen space.
Hindsight:
Looking back, painting the wall a dark color before applying the pole wrap would have been beneficial. This step would have masked the imperfections where the reeded wood isn’t perfectly flush, revealing glimpses of the wall beneath. To address this, we had to improvise and fill these areas with leftover material scraps.
Additionally, in hindsight, it would have been wiser to install the floating shelf after completing the paneled wall. However, the concept of the accent wall was already in place and inspired our decision to install it concurrently.


One Comment
Comments are closed.