Are you looking to add a touch of timeless elegance to your dining room on a budget? Installing decorative wall trim could be the perfect solution. This classic architectural detail not only enhances the aesthetic appeal of any space but also adds depth and sophistication. In this blog post, we’ll guide you through the step-by-step process of installing molding to transform your dining room into a stylish haven.
What You’ll Need:
Before you begin, gather these materials:
- Decorative wall molding (approximately 1.5” wide)
- Chair rail molding
- Construction adhesive
- Finishing nails (18 gauge recommended)
- Caulk
- Wood filler
- Paint and primer
- Measuring tape
- Level
- Saw (for cutting molding)
Step 1: Preparation
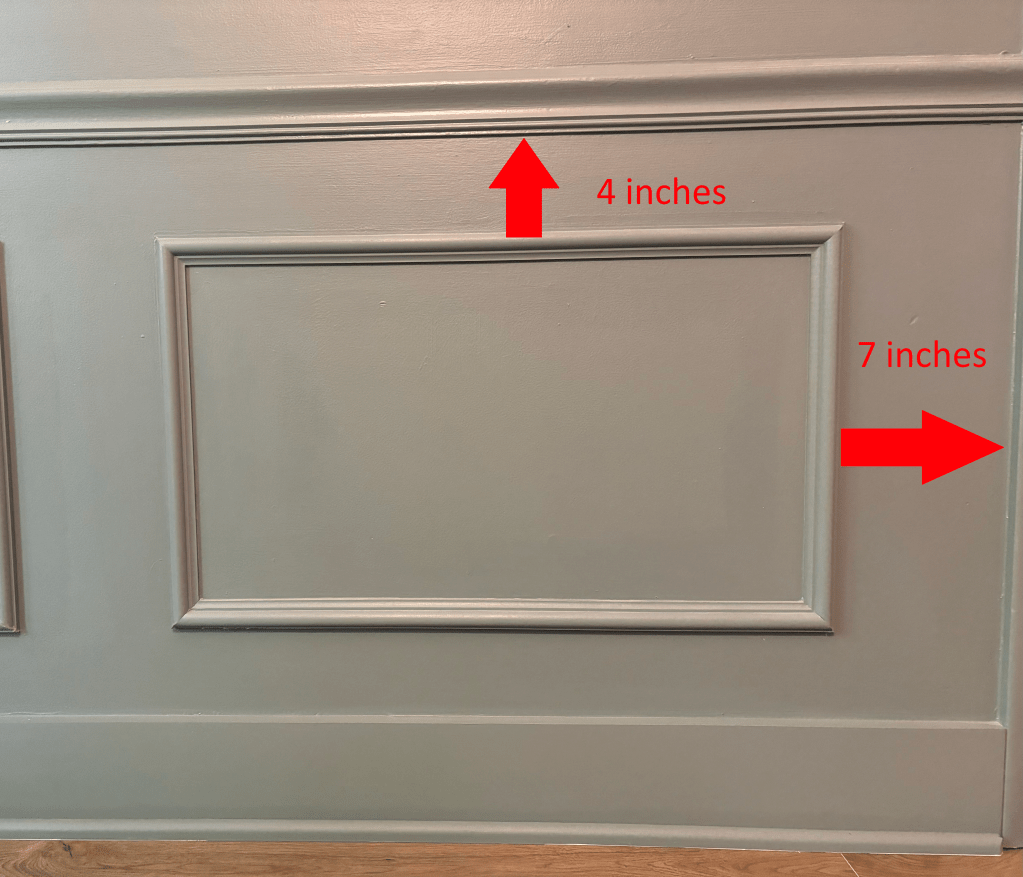
Start by measuring your dining room walls to determine the amount of decorative trim and chair rail molding needed. Plan the layout carefully, considering the dimensions of each wall. For uniformity, maintain consistent spacing between each vertical and horizontal trim piece. The measurements that worked for us were 7” between vertical trims and 4” from horizontal pieces like the chair rail. Mark the wall lightly with a pencil where the chair rail and decorative trim will be installed. Remember, it’s not necessary for every wall to have the same size boxes, as long as the spacing between each box and wall trim remains consistent, the overall appearance will remain balanced.

Step 2: Install Chair Rail
Typically positioned between 30 to 48 inches from the floor, install the chair rail molding at your chosen height. We placed ours at 34” from the floor to the top of the rail. Ensure it’s level by using a level tool. Apply construction adhesive to the back of the molding and press firmly against the wall. Secure with finishing nails, ensuring they are slightly countersunk.
Step 3: Cut and Install Decorative Molding
Measure and cut the decorative molding to fit within the designated areas on your walls. Cut each end at a 45-degree angle for clean joints. Apply construction adhesive to the back of each piece and press it firmly against the wall. Use a level to ensure each panel is straight and evenly spaced. Secure with finishing nails, and if necessary, use a nail set to tap in any exposed nail heads.
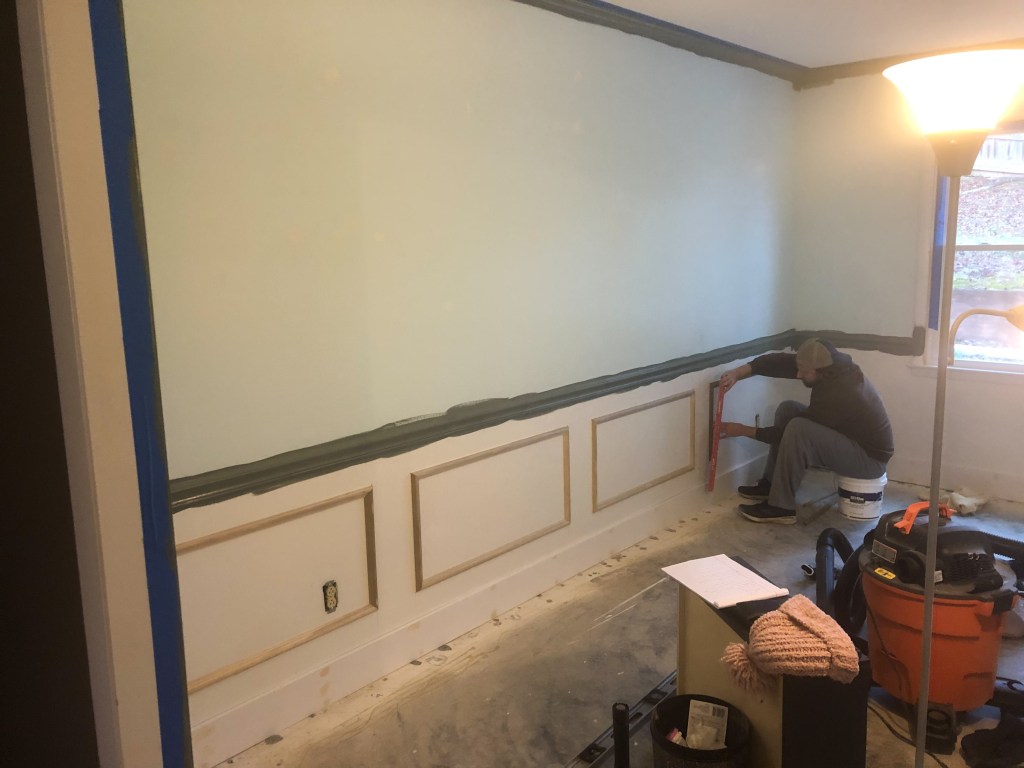
Step 4: Caulk and Fill
Once all trim pieces are installed, fill any gaps between the panels and moldings with caulk. Apply caulk along the edges where the molding meets the wall to create a seamless appearance. Allow the caulk to dry completely according to manufacturer instructions. Use wood filler to fill any nail holes, then sand down rough spots for a smooth finish.
Step 5: Paint
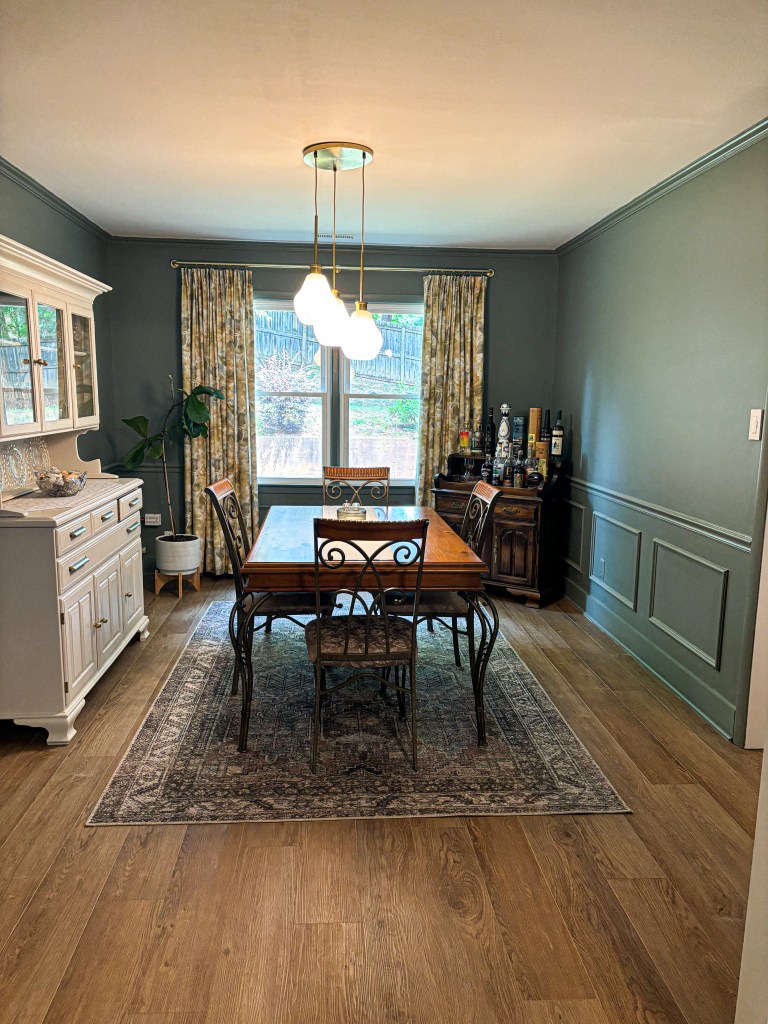
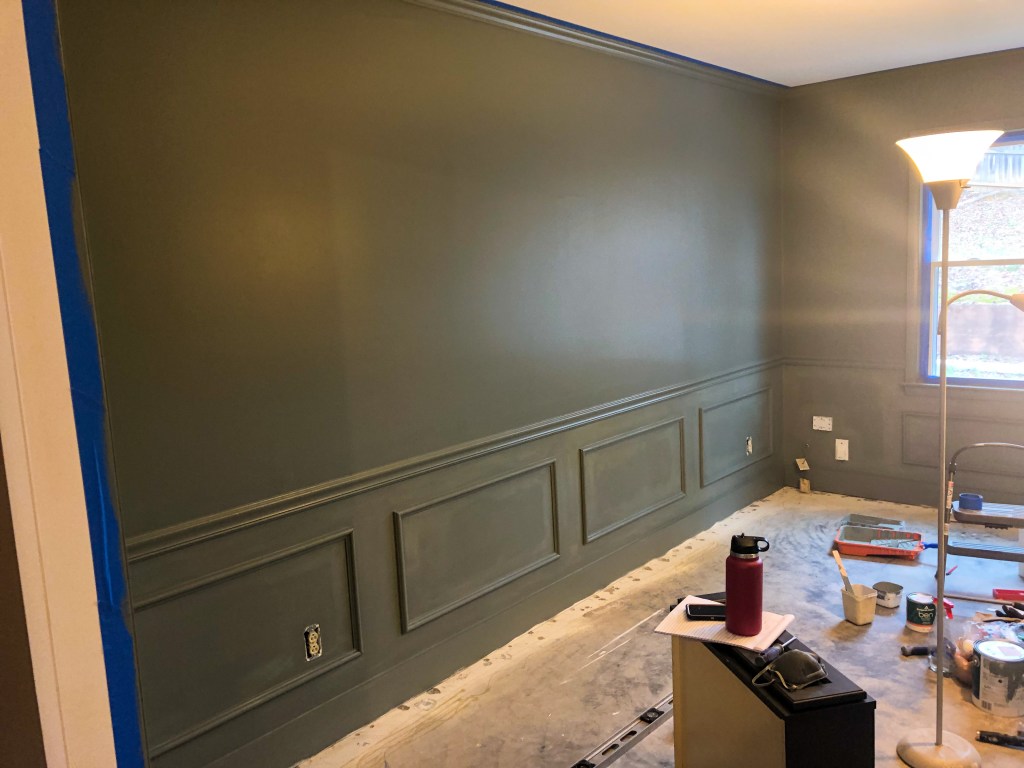
Prepare for painting by sanding any filled spots on the trim. Apply primer and paint to the walls, trim, chair rail, and baseboard in your desired color scheme. For a sophisticated look, consider painting everything in the same color for a cohesive appearance. We opted for Benjamin Moore’s Intrigue to create a moody atmosphere in our dining room.
Conclusion:
We’re delighted with how our dining room has been transformed! This cost-effective upgrade has added character and charm while enhancing the overall ambiance of the space. While we still have some finishing touches to add, the hardest part of this room makeover is complete.
Installing decorative trim is a fulfilling DIY project that can significantly enhance the aesthetic appeal of your dining room. With careful planning and attention to detail, you can achieve a sophisticated look that mimics traditional wainscoting at a fraction of the cost. Enjoy the process of turning your dining room into a stylish and inviting space that reflects your personal style and creativity.